
News, Stories and more
Our Blog
View BY :


Jacob Long's Nineteen Years of Roast Craft, Seasonal Sourcing, and the Soul of Artisan Coffee
June Feature | Roastmaster’s Select
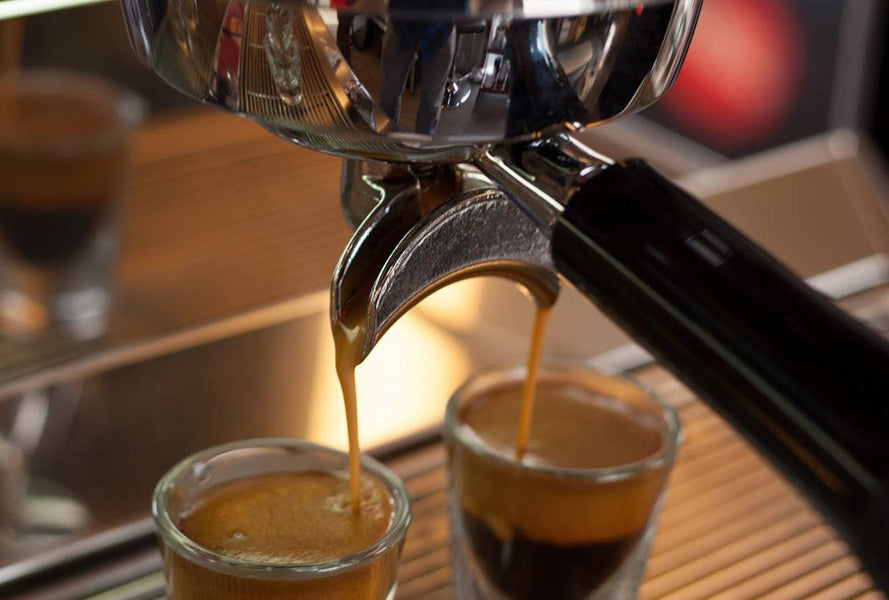
There’s a particular fragrance that drifts through the roastery in the early morning before the harbor fully wakes up. Warm sugars beginning to caramelize. Citrus lifting from the drum. A fleeting note of cedar or cocoa carried out toward the Pacific fog.
For nearly two decades, that rhythm has belonged in part to Roastmaster Jacob Long.
This June marks Jacob’s 19th year at Thanksgiving Coffee Company, continuing a craft lineage that began with co-founder Paul Katzeff in the 1970s and stretches further still, through the farmers, cooperatives, and communities whose hands shape every harvest. What began in 2007 as an apprenticeship in artisan roasting has grown into one of the defining expressions of the Quarterly Roast Masters Select and the Roastmasters's Select Club: a living exploration of seasonality, processing innovation, and the ongoing craft of honest roasting.
At Thanksgiving Coffee, roasting is about relationship, calibration, curiosity, and honoring the potential hidden inside every green coffee seed.
And after more than fifty years of roasting coffee on the Mendocino Coast, with nineteen of them shaped alongside Jacob at the roaster, that sense of curiosity and care still moves through every batch that passes through the drum.
From Dark Roasts to Flavor Exploration
When Jacob entered the specialty coffee world in 2007, the industry was in the middle of a significant shift. Roasters were pushing toward lighter profiles, asking new questions about what coffee could taste like when the roast stepped back and let origin speak.
The conversation expanded quickly beyond country of origin into varietals, farmer lots, fermentation methods, and post-harvest experimentation. Processing techniques once rare or little known outside producing regions now shape some of the most sought-after coffees in the world.
Processing Method
1. Washed
2. Natural
3. Honey Process
4. Anaerobic Fermentation
Flavor Profile
1. Clean, bright, transparent acidity
2. Fruity, sweet, berry-forward
3. Syrupy body with layered sweetness
4. Wine-like complexity, tropical fruit, spice
Anaerobic coffees in particular have transformed modern specialty coffee. By fermenting coffee cherries in oxygen-free environments, producers can unlock deeply expressive flavor profiles unlike anything the industry experienced a generation ago: notes reminiscent of sangria, ripe mango, cacao nibs, or fermented berries.
For Jacob, this evolution opened the door to a new era of creativity. But it never changed the foundation.
“Paul really encouraged exploration. We already had a strong foundation and clear roasting parameters, but there was room to evolve, to seek out unique coffees and showcase what producers were truly capable of.”
That spirit helped shape Roastmaster’s Select, where seasonality, rarity, and craftsmanship take center stage.
June is also a time we recognize World Environment Day, and coffee reminds us how deeply flavor is connected to ecology. Altitude, rainfall, biodiversity, soil health, and careful stewardship all shape what ultimately arrives in the cup. Every harvest is a reflection of an ecosystem in consant motion.
“Paul really encouraged exploration. We already had a strong foundation and clear roasting parameters, but there was room to evolve, to seek out unique coffees and showcase what producers were truly capable of.” Jacob Long
Following the Harvest
Coffee is seasonal agriculture. Just as wine changes with vintage and climate, coffee moves through harvest cycles around the globe. One of the first things Jacob evaluates when selecting a coffee for Roastmaster’s Select is simple: is it the right moment for this bean?
Fresh crop coffees arrive with heightened aromatics, vivid acidity, and a clarity in the cup that slowly fades with time. Sourcing seasonally is not a preference. It is often the difference between a memorable coffee and a merely good one.
As Director of Coffee, Jacob works closely with trusted importers, cooperatives, and producers across many growing regions to source extraordinary coffees at peak freshness. His work combines sensory calibration, relationship-building, seasonal timing, and years of cupping experience to help shape each Roastmaster’s Select release.
This creates the opportunity to feature rare microlots, innovative processing methods, and seasonal offerings that many coffee drinkers rarely have the opportunity to experience.
As harvest seasons become less predictable and coffee communities adapt to new challenges, long-term relationships and shared knowledge have become essential to sustaining both exceptional coffee and the people who grow it.
Over the years, Roastmaster’s Select has featured coffees from:
-
Ethiopia:
Hafursa, Banko Dhadhato, Konga, Refisa
-
Nicaragua:
Finca Alexa, Finca Los Pinos, Carlos Lanzas, Reynaldo Mairena
-
Honduras:
COMSA Cooperative, Miriam Perez
-
Kenya:
Nyeri Othaya Ichamama
-
Peru:
COCLA Cooperative, Sol Y Café Cooperative, Finca Matapalo
-
Guatemala:
Los Jóvenes ASOBAGRI Cooperative, Finca Las Mercedes
-
Tanzania:
Zanzibar Peaberry
-
Malawi:
Mzuzu Cooperative
-
Indonesia:
Sulawesi, Sumatra, Flores, Java
-
Mexico:
Enjambre Cafetalero Cooperative
-
Ecuador:
FAPECAFES Cooperative
-
Bolivia:
Cooperativa Aljiri
-
Brazil:
COOPFAM Cooperative
-
El Salvador:
El Mural Pacamara
-
Laos
Jhai Cooperative
-
Colombia
Finca La Cabana, Finca Agroberlin, COSURCA Cooperative
-
Panama Geisha
Finca Lerida Geisha
-
Papua New Guinea
Nebilyer Valle
-
Costa Rica
Finca La Amistad
-
Yemen
Sharqi Haraz Cooperative
-
Uganda
Mirembe Kawomera Cooperative
-
Congo
SOPACDI Cooperative, Mukwinja Station
These coffees represent more than geography. They reflect distinct climates, elevations, varietals, processing innovations, and the evolving creativity of the people producing them.
Through the work of the Cupping Labs project, before “single farmer lots” became a marketing phrase across the industry, Thanksgiving Coffee initiated farmer-focused sourcing through it's Campesino campaign (2005), moving beyond broad regional designations to spotlight individual growers and cooperative communities by name.
That early work laid the foundation for Jacob to create what the Roastmaster’s Select is today: coffees chosen not simply for origin, but for the distinct personalities, processing styles, harvest conditions, and craftsmanship of the people behind them.
Roastmaster Jacob Long evaluating coffees in Thanksgiving Coffee’s cupping lab
The Craft Behind the Cup
Roasting coffee at this level requires constant calibration.
Jacob’s work extends far beyond standing beside the drum. Inside the cupping lab, coffees are evaluated for sweetness, balance, defects, mouthfeel, and aromatic complexity. Roast profiles are continuously refined through tasting and data analysis.
His training through the Specialty Coffee Association and the Coffee Roasters Guild spans sensory evaluation, green coffee grading, espresso profiling, quality control, barista education, and coffee purchasing: a full spectrum of the craft practiced daily inside the cupping lab.
But even with all the science, coffee remains deeply human.
Roastmaster’s Select is also a story of mentorship across generations. Jacob’s nineteen-year journey has unfolded alongside decades of wisdom shared by Paul Katzeff, whose sourcing philosophy, sensory calibration, and commitment to craft helped shape the foundation Thanksgiving Coffee continues to build upon today.
“There’s a real privilege in working with coffees like these. And being able to talk about them with Paul has always been special because we’re calibrated. We taste similarly. We understand what we’re looking for.” Jacob Long
That continuity matters. It connects the original artisan coffee movement of the 1970s and ‘80s with today’s evolving specialty landscape and with the farmers who made all of it possible.
The Artisan Revival
As coffee culture has accelerated, many companies have narrowed their sourcing or standardized offerings for efficiency. Roastmaster’s Select moves in the opposite direction.
It is built around curiosity, seasonality, and the belief that coffee can still surprise us: that there are still harvests worth waiting for, producers worth knowing by name, and roast profiles worth refining one batch at a time.
Each featured coffee becomes a window into a particular harvest, landscape, and way of tending the craft: a producer’s innovation, a region’s seasonal peak, a processing method newly emerging into wider recognition, or a fleeting flavor profile that may never appear exactly the same way again.
This is the heart of artisan roasting: not control over nature, but collaboration with it.
And after more than fifty years of roasting coffee on California’s North Coast, that sense of wonder still remains at the center of what we do.
Summer Solstice & Slow Coffee Rituals
Along the Mendocino Coast, summer does not arrive all at once. The season unfolds slowly through shifting marine layers, pockets of warm light, and the ongoing dance between fog and sun.
As the Summer Solstice approaches, mornings begin cool and quiet in Noyo Harbor before the light gradually breaks through. It is the kind of weather that invites long cups of coffee and afternoons shaped more by tide and wind than by the clock.
Whether brewed hot against the coastal chill or over ice when the sun finally takes center stage, Roastmaster’s Select is designed to move with the rhythm of the season and the harvest itself.
Along the harbor, coffee rituals shift with the season too. Most mornings call for a warm mug against the coastal fog, while brighter afternoons can invite slower cold brew pours shared between worktables, docks, and backyard gatherings.
We invite you to welcome this solstice season with a simple Roastmaster’s Cold Brew Float: rich coffee concentrate poured over vanilla ice cream for a balance of brightness, sweetness, and roast depth.
Roastmaster’s Cold Brew Float
A harbor-side ritual for shifting summer skies and slow North Coast afternoons.
Roastmaster’s Cold Brew Float
Ingredients:
- 4 oz cold brew concentrate
- 1 scoop vanilla ice cream
- Sparkling water (optional)
- Fresh grated chocolate or cinnamon
Instructions:
1. Fill a glass with ice.
2. Add cold brew concentrate.
3. Top with a scoop of vanilla ice cream.
4. Add a splash of sparkling water for lighter texture, if desired.
5. Finish with grated chocolate or cinnamon.
The result is creamy, bold, and beautifully balanced between sweetness and roast depth: a small ritual worth building into the solstice season.
Looking for a meaningful Father’s Day gift? The Roast Masters Club offers an ongoing journey through seasonal coffees, rare origins, and artisan roast craftsmanship for the person in your life who starts every morning with intention.
Explore Roastmaster’s Select
The Quarterly Roastmaster Select and the Roastmaster’s Select Coffee Club are designed for coffee drinkers who want to experience the evolving artistry of coffee harvests around the world, from washed Ethiopian coffees bursting with florals to experimental anaerobic lots layered with tropical fruit and spice.
For Jacob Long, the work remains both technical and deeply personal: listening closely to each coffee, honoring the harvest, and helping reveal the character already waiting inside the bean.
At Thanksgiving Coffee, we continue to follow the harvest with gratitude, curiosity, and deep respect for the people whose hands shape every cup.
Stay in touch, we love to hear from you
Following the Harvest: The Art of Roastmaster Jacob Long
For nineteen years, Roastmaster Jacob Long has helped shape the evolving craft of coffee at Thanksgiving Coffee Company. In this story, we follow the harvest through seasonal sourcing, innovative processing methods, and the relationships that connect farmers, roasters, and coffee drinkers across the globe. From rare microlots to the rhythms of Noyo Harbor, discover how craftsmanship, curiosity, and long-term partnerships continue to guide every Roastmaster’s Select release.
read more-
![Cold Brew Coffee: An Easy Guide & Our Favorite Coffees]()

Cold brew is one of our favorite ways to enjoy coffee during the warmer months. Brewing with cold water over time creates a naturally smooth, refreshing cup that highlights subtle sweetness and flavor.
Whether you’re making your first batch or looking for a new coffee to try, here’s everything you need to get started.
Easy Cold Brew Recipe
INGREDIENTS
– 1 cup coarsely ground coffee
– 4 cups filtered water
– IceINSTRUCTIONS
1. Combine coffee and water in a large jar or French press.
2. Stir gently until all grounds are wet.
3. Cover and refrigerate 12–16 hours.
4. Strain through a fine mesh filter or paper filter.
5. Pour over ice and enjoy.Don’t worry about making it perfectly! Cold brew is one of the most forgiving brewing methods, so it’s easy to adjust the strength and flavor to suit your taste.
Tip: Prefer a stronger concentrate? Use a 1:3 coffee-to-water ratio and dilute to taste.
Choosing the Right Coffee
Almost any coffee can be cold brewed, but different origins create surprisingly different results.
Looking for a place to start? These are three of our favorite coffees for cold brewing:
- Ethiopia Natural: Perfect if you like fruit-forward iced coffee.
- Grey Whale Blend: A crowd-pleaser that makes an incredibly approachable cold brew.
- Pony Express: Excellent for people who add milk or cream.
Why People Love Cold Brew
Cold brewing creates a smooth, refreshing cup that many coffee drinkers love for its:
– Smooth, mellow flavor
– Naturally lower perceived acidity
– Sweet, nuanced tasting notes
– Refreshing over iceWhether you enjoy bright fruit-forward coffees like Ethiopia Natural or richer blends like Grey Whale Blend or Pony Express, cold brew is a forgiving brewing method that’s fun to experiment with.
Make It Your Own
Once you’ve mastered the basics, experiment with different flavors to make your cold brew your own. Consider adding:
- A splash of oat milk or cream
- Orange peel for a bright citrus note
- Vanilla syrup or honey
- A cinnamon stick while serving
- Sparkling water or tonic for a refreshing coffee spritz
We'd love to hear how you're enjoying it!
Frequently Asked Questions
How much coffee should I use for cold brew?
Just follow the recipe above: 1 cup coarsely ground coffee to 4 cups filtered water. Cold brew is wonderfully forgiving, so don’t be afraid to experiment until you find your perfect strength.
Want to get precise? If you like brewing by weight, we recommend starting with 2 grams of coarsely ground coffee for every fluid ounce of water. It’s a reliable ratio that produces a smooth, balanced cold brew.
How long should cold brew steep?
For the best flavor, steep your coffee in the refrigerator for 12–16 hours. A longer steep (up to 24 hours) will produce a stronger, more concentrated brew, while a shorter steep may taste thin or under-extracted.
Can I make cold brew in a French press?
Absolutely. A French press is one of the easiest ways to make cold brew at home. Add your coffee and water, let it steep, then slowly press the plunger and pour. For an even cleaner cup, you can strain it through a paper coffee filter after pressing.
What are your best cold brew tips?
A few simple tips can make a big difference:
– Use coarsely ground coffee.
– Brew with filtered water whenever possible.
– Strain through a paper filter, fine-mesh sieve, or cheesecloth for a cleaner cup.
– Store finished cold brew in the refrigerator for up to a week.Can I drink cold brew hot?
Yes! Simply warm your cold brew concentrate with hot water. You’ll enjoy the naturally smooth, low-acid flavor of cold brew in a hot cup.
How long does cold brew last?
Stored in an airtight container in the refrigerator, cold brew typically stays fresh for up to one week. Because it isn’t exposed to heat during brewing, it tends to retain its smooth flavor longer than brewed hot coffee.
How do I keep my iced coffee from getting watered down?
Freeze leftover cold brew into ice cubes and use those instead of regular ice. As they melt, they’ll keep your drink cold without diluting the flavor.
Is cold brew good for baking?
Yes. Because cold brew is naturally smooth and lower in acidity, it works well in recipes like brownies, cakes, marinades, and barbecue sauces where you want rich coffee flavor without extra bitterness.
Whether you’re brewing your first batch or perfecting your summer routine, cold brew is one of the easiest—and most rewarding—ways to enjoy great coffee at home. We hope these tips inspire your next brew.
Cold Brew Coffee: An Easy Guide & Our Favorite Coffees
read more -
![How to Make Perfect Steamed Milk]()

How to Make Velvety, Naturally-Sweet Milk
Milk becomes naturally-sweet when heated to the ideal, not-too-hot, temperature. (Ever get warm milk before bed as a child... or even as an adult?). It quickly becomes scalded-tasting at too high a temperature. For this reason, it is imperative that the milk steamed for espresso drinks not be over-heated.
Excellent steamed milk vs. sloppy
Step 1: Use cold milk
For best results, use very cold milk and a very cold pitcher. Some baristas leave the pitchers in the refrigerator.
Step 2: Use the proper amount of milk
Pour only as much milk as you will need for a single drink into the pitcher (slightly more than 1/2 of the volume of the cup used). You should be selecting your pitcher based upon the drink you plan to make - a 12 oz pitcher filled to a bit below the base of the pour spout for a cappuccino and a 20 oz pitcher filled to that spot for a latte.
Step 3: Position the pitcher
Position the pitcher parallel to the steam wand and put the wand into the milk so that the end of the wand is just submerged. Hold the pitcher with your non-dominant hand, with the weight of the pitcher held in your hand and with one finger touching the bottom and use the other to operate the steam knob and to gauge the temperature of the milk.
Step 4: Steaming, part one
Turn steam knob so that the steam is on full blast and stretch the milk for only a few seconds, allowing bubbles to form on the surface. Do this for a bit longer if making a cappuccino, for more foam. You should finish stretching the milk before it becomes warm to the touch, to ensure the smoothest, most fine foam.
Step 5: Steaming, part two
Turn the pitcher so that it is parallel to the floor, roughly perpendicular now to the steam wand, as you allow the steam wand to bury further into the milk (about one inch). The milk should begin circulating around smoothly in the pitcher, swirling from top to bottom like a convection current. Do this until the milk is just hot enough that you want to remove your hand from the side of the pitcher, then turn off the steamer and set milk on counter (remember to wipe the steam wand with a damp rag).
Step 6: Polish the milk
Polish the milk by swirling it a few times to make sure all foam is integrated and smooth. It will actually become shiny on top with this action. Tap the pitcher on the counter if any large bubbles remain. The milk should be shiny and smooth, with no visible bubbles, only tiny, frothy ones. It should taste creamy and be warm on the tongue, but not scalding – the right temperature to consume immediately at peak sweetness.
Step 7: Rinse pitcher
Rinse pitcher thoroughly and return it to a cool place.
Integrating your milk with your espresso:
- Pour your desired amount of milk into the pitcher, and leave on the counter while you...
- ...follow Steps to Pull an Excellent Espresso
- As soon as you have pressed the button to start your espresso shot, begin steaming the milk. Milk should take about 20 seconds, espresso about 23-30.
- Follow all steps to velvety, naturally-sweet milk.
- As soon as your espresso is done, begin pouring milk into it. This should be done by tipping the cup so that the milk can pour slowly down the side, again making a convection-like current in the cup. When you have about 1” of room left, bring the pitcher tip close to the drink surface (which may require tilting the cup) while continuing to pour and tip the pitcher at a steep angle toward it, jiggling your wrist so that the foam piles onto the drink. No scooping with a spoon should be necessary.
Shop our best-selling espresso roasts!
Like us on Facebook and follow along on Instagram and Twitter for frequent updates, promotions, giveaways and more!
How to Make Perfect Steamed Milk
read more -
![How to Select Your Perfect Roast]()

How to Select Your Perfect Roast
Roast color determines 80% of a coffee's flavor.
Like a piece of bread, raw coffee is mostly carbohydrates like starches and oils, although there are over 1600 chemical compounds in a single coffee bean. When a slice of bread is toasted, it browns until it burns. Toasted light, you can taste the wheat. Toasted until burnt or very dark, you taste only the charred remains. So it is with our coffee bean (seed). The flavor changes with the degree of roast. A light roast Colombian tastes more like a light roast Nicaraguan than like a medium roast Colombian coffee.
Roast color is a function of temperature and time. Relatively speaking, artisan roasters use variations of these controllable factors to create flavor. Roasting is a craft much like pottery is. Two potters using the same clay, the same glazes, and the same shapes will have different outcomes. Temperature + time in the kiln will determine what the craftsman’s effort will produce. So it is with coffee. Generally, the coffee begins to roast at 405°F when the starches can get no hotter and they break down into simple sugars that carmelize at about 420°F. That is when the light roast is pulled or dumped. It can take from 8-14 minutes to get to a light roast color.
Between 420° and 475°F the color darkens until nothing is left to taste except burned plant matter!
Light Roast - nuanced, bright, lively
In the lighter roasts (both light and medium), you can taste the nuance and impact of terroir. If you’re a single origin lover, these coffees are your go-to. With a light roast especially, the specific qualities unique to the coffee’s origin stand out. If you’re sticking with Vienna and French roasts (the darker beans), you have to work harder to tell the differences between origins. With light, it’s all there in the first sip.
For those of you that cup your coffee and take the time to taste every flavor, the lights and mediums are probably the roasts for you. When purchasing a single origin coffee, the great ones are best at this roast color.
Medium Roast - nutty, spicy, balanced, fruity
Roasted about 20 degrees Fahrenheit higher than the light, the color on a medium roast coffee bean shifts into a chocolate brown. As you move from the light roast to the medium, the bright and lively acidity morphs into a smoother, deeper, and more balanced mouth feel. In every sip of a medium roast, you’ll find that a certain mellowness and maturity prevails.
Dark Roast - bold, spicy, chocolaty
The coffee bean color on our dark roast (sometimes called the Vienna roast) is still more brown than black. You could compare it to the color of baker’s chocolate. When this coffee is freshly roasted, the beans will have a shiny coat of coffee oils on their surface. The greatest dark roast coffees will have hints of carbonization, but shouldn’t be described as smoky or toasty — we’ll leave those descriptors to the very dark roast.
Very Dark Roast - toasty, smoky, carmelized sugars
Ah, the “French Roast.” This is the coffee that goes great with a splash of milk. The coffee bean color on our very dark roast is more black than brown, with rich and copious levels of surface oil. Roasted long and hot to produce deep carbony, smoky flavor notes. A well-made French roast will have caramelized sugar notes, licorice and roasted chestnut flavors, and a long wet (not ashy) finish.
Like us on Facebook and follow along on Instagram for frequent updates, promotions, giveaways and more!
How to Select Your Perfect Roast
read more -
![Top 4 Organic Coffees]()

4 of Our Best-Selling Organic Coffees
Our organically grown coffee is free of pesticides and preservatives.
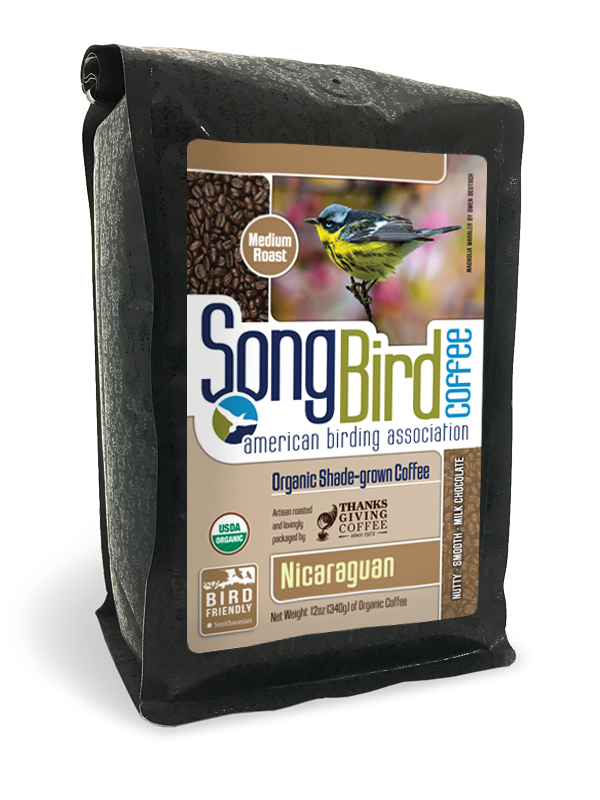
Songbird Nicaraguan
Each package sold benefits the American Birding Association's programs in Central America. By drinking shade-grown and bird friendly certified coffee every morning, you are supporting these coffee farmers, the efforts of the ABA, and the countless birds they are protecting through community outreach and conservation. Learn more. Since 1998 we have raised $212,012.30 and counting…
Sweet without sugar, mellow without cream, it is a great breakfast coffee.
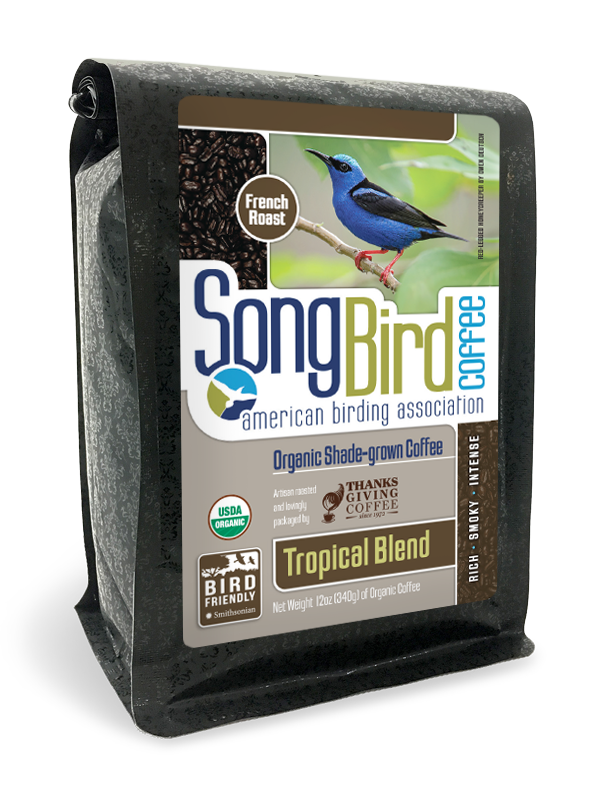
Noyo Harbor French
Distinctively smoky flavor with hints of jammy fruit, roasted nuts and baker's chocolate. This is our signature FTO French Roast, featuring coffees from Central America, South America and Indonesia.
Paul's Blend
Paul's Blend is one of the award-winning coffee roasts from our 2017 Roaster of the Year prize.
With so many great coffees to showcase our work here at Thanksgiving Coffee, Roastmaster Jacob Long chose to present the Roaster of the Year judges with a few of our freshest coffees: the vibrant and rich Kenya Nyeri Peaberry, floral Ethiopia Yirgacheffe, and the beloved fruity-chocolatey Paul's Blend.
Co-founder and Roastmaster Emeritus Paul Katzeff created this blend to showcase his favorite coffees. Blueberry notes add to hints of cashew and chocolate.
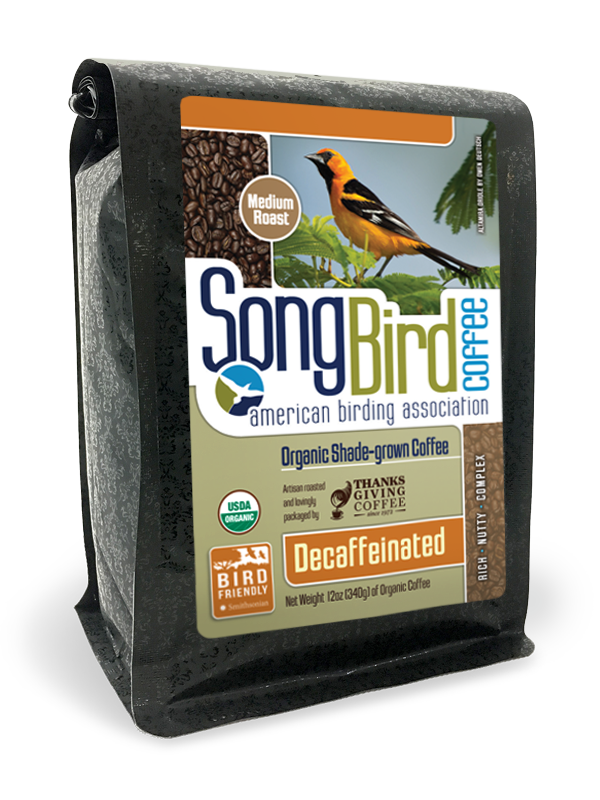
French Decaf
Formerly known as "Nighthawks French", this Water Processed French decaf is roasted to our darkest level. It is amazing how much this tastes like regular caffeinated coffee! This coffee is organically grown in Mexico and decaffeinated at a nearby facility to reduce its carbon footprint.
Like us on Facebook and follow along on Instagram and Twitter for frequent updates, promotions, giveaways and more!
Top 4 Organic Coffees
read more -
![How to Pull an Excellent Espresso]()

How to Pull an Excellent Espresso
The quintessential expression of coffee is espresso.
-Ernesto Illy
A few words about espresso...
Espresso was invented in Italy at the beginning of the twentieth century as a way to brew a fresh, delicious cup of coffee fast. It is made by sending pressurized hot water through the coffee grounds to extract the sugars and oils from the coffee. Because of the speed and high pressure of this method, a full, rich coffee is created, without many of the bitter notes that come out in coffee brewed at low pressures. With this in mind, you should strive to make every espresso beverage with careful precision and attention to freshness.
Now, lets get into it! Keep reading to learn how to pull an excellent shot of espresso.
Step 1: Remove the portafilter
- Remove the portafilter from the machine. Knock out the spent puck.
- Lock the empty portafilter back into the machine.
- Run water to rinse for a few seconds.
- Remove the portafilter and use a dry towel to thoroughly wipe the inside of the portafilter until it is clean and dry.
Step 2: Grind
- Grind every shot fresh.
- Because coffee flavor begins to rapidly deteriorate as soon as it is ground, no grounds should be left in the hopper.
- Grind only what you need to dose one shot, then immediately turn off the grinder.
Step 3: Fill the portafilter
- Fill portafilter so that the coffee makes a cone shape about half an inch above the lip of the portafilter. This should be almost exactly 20 grams (hint: use a scale!)
- Use the side of your index finger to carefully, but quickly, distribute the grounds in a circular motion. You should be packing the ground coffee evenly, with no overdosed or underdosed patches.
- Level the dose by running the side of your index finger across the top. (very little coffee should wind up in the garbage if you dose and level correctly.)
Step 4: Tamp
- Lay tamper onto coffee evenly with very light pressure, but keeping your finger tips level with the top edge of the tamp's vertical edge.
- Press tamper evenly and with enough pressure so that your fingertips make contact with the top rim of the portafilter basket.
- Twist tamp so that it polishes the surface of the pressed coffee, and finish by wiping the grounds off the portafilter.
Step 5: Prepping the group head
- Purge the group head for one or two seconds.
- Wipe dry with a clean rag to prevent premature infusion.
Step 6: Pull the shot
- Put the portafilter into the group head, make sure it fits snug. No need to overtighten. If it leaks, your gasket may need replacement.
- You'll want to pull the shot directly into the mug you're serving the coffee in. Position it so that the espresso will fall roughly in its center.
- Press the double shot button and wait between 18 and 26 seconds from the time the espresso begins to pour to finish. (It may not begin pouring for 3-5 seconds, meaning total shot time should be between 21-31 seconds)
- Watch carefully to see that it has a thick consistency, reddish brown color in a thin, slightly wavering stream.
- When the espresso begins to thin and turn from orange/yellow to white, stop the machine immediately.
- The final product should have a thick crema of reddish-brown swirling color and be almost syrupy in body, with slight black flecking, small bubbles, and a warm, nutty sweet-tangy aroma.
Step 7: Check your work!
- If you are uncertain whether you followed the steps correctly, take out the portafilter and examine the waste. The top of the coffee should be hard and with a single, round dent in the middle (if your group head screen has a screw) and no pits anywhere.
- Knock out the grounds, it should come out in a round, hard puck with a single knock.
- Keep working to refind your technique until you find a perfect rhythm that generates consistent results and stick with it. Consistency is key!
Shop our best-selling espresso roasts!
Like us on Facebook and follow along on Instagram and Twitter for frequent updates, promotions, giveaways and more!
How to Pull an Excellent Espresso
read more -
![How to Keep Your Coffee Fresh]()

How to Keep Your Coffee Fresh
The Importance of Properly Storing Your Coffee
Coffee is a perishable product. There are over 800 organic compounds in a roasted coffee bean:
- Water-soluble compounds – the sweetness and bright acidity
- Oil-solubles – the tars, tannins and bitters
These compounds easily combine with oxygen when exposed to air, heat, and light, forming new compounds that dull the flavor of roasted coffee. So, you'll find over time, those flavors get muted at first, and then fade into a flat, sour taste. Caffeine doesn't break down, so its bitterness remains and overwhelms your palate.
To stop this “staling “ process and preserve great flavor, proper storage is essential.
Coffee isn't immortal! Left exposed, roasted beans will slowly stale within one week—even sooner if ground. However if properly stored, coffee can have a shelf life up to six months.
How to Keep Your Coffee Fresh
🌬️ Air: Keep your coffee from contact with air by storing your coffee in a closed mason jar or a container with a good lid. It you plan to use your coffee in just under a week, the refrigerator is fine. Remember: coffee is under 5% moisture so it will absorb flavors if not in an airtight container.
🔥 Heat: Keep your fresh coffee away from heat—cool is best. We recommend storying it in the refrigerator for best results. The hotter the beans get while in storage, the faster the organic compounds will combine and become stale components.
💦 Moisture: Avoid humidity! Moisture + heat = stale beans in 24 hours.
☀️ Light: If you address the problems of Air, Heat and Moisture correctly, then Light will have little effect on your coffee.
⏰ Time: Buying what you can use in 7 days. Don’t open a bag until ready to use. Within three days of opening, transfer beans to an airtight container. (No need to purchase an expensive kitchen accessory for this. Just use a quart mason jar and seal it with a lid.)
Store sealed jars on lower shelves where air is cooler.
Causes of Coffee Staling
Staling is caused—from most harmful to least—by:
1. Air (Oxidization)
Roasted coffee beans are composed of approximately 800 organic chemical compounds. Many of these organic compounds create the flavor you love.
There are sugars, alcohols, acids, ketones, aldehydes, minerals, flavonoids, and antioxidants. When exposed to air, many of these compounds will combine with the oxygen, creating off flavors.
- Fresh coffee loses brightness and personality gradually over a month once a vacuum-sealed bag is opened
- High-quality coffee lasts longer but its "fall over the cliff" seems more dramatic. This is because the taste of lesser coffees when fresh often resembles stale coffee.
2. Heat
Heat speeds up all chemical reactions. Keep the coffee cool but not frozen to slow oxidization. Higher temperatures cause organic compounds to combine quickly and create stale flavors.
3. Moisture
Roasted beans are very dry—like a sponge—so they pull moisture from the air. Moisture softens beans and accelerates oxidation, reducing flavor.
4. Light
Light alone takes a long time to damage beans, but sunlight adds heat, which speeds staling. If you address the air, heat, and moisture issues, then the light will be a small factor. On it’s own, in my experience, light alone will take a long long time to damage coffee beans. However, if coffee beans are exposed to prolonged sunlight, then heat becomes the primary culprit.
How We Do It
At Thanksgiving Coffee, we package our coffee in opaque, nitrogen-flushed, vacuum-sealed bags within 18 hours of roasting. This deals with every factor that will impact flavor. Our goal is to keep your coffee at its peak!
Cover photo credit: coffeegeek.tv
You may be interested in...
Sold out
Sold out
Sold outHow to Keep Your Coffee Fresh
read more -
![Coffee Tips: Part II - 7 Ways to Brew Your Coffee]()

7 Ways to Brew Your Coffee
We’ve talked about the basics, now let’s get into the fun stuff. We hope this post will help you find your ideal coffee brewing method. As with anything, there are pros and cons to each method – and we’ve done all the work and research for you.
1. Stovetop
This one is perfect for you if you want homemade espresso but don’t necessarily want to drop a couple hundred dollars on a fancy machine. The result is rich, delicious coffee that you can craft into lattes or just enjoy by itself.
Grind
Start with a fine grind setting (#3.5), slightly coarser than texture of granulated sugar. When pinched, the ground coffee should not compress or clump.
Directions
- Fill the coffee chamber with finely ground coffee, be careful not to pack the coffee too densely.
- In a kettle, boil enough water to fill the water chamber.
- Place freshly boiled water in the water chamber, place coffee-filled chamber on top, and, using a towel or pot holder to protect your hand from heat, screw on the brewed coffee chamber.
- Place the stove top espresso maker on a burner at low to medium heat.
- As the coffee brews, watch and listen for a sputtering noise; this signals the end of the brewing. Immediately remove the espresso maker from the stove and run the bottom (water chamber) under cold water for 10 seconds to cool the chamber and stop the extraction.
- Serve your fresh espresso and enjoy.
Pros:
- Rich, delicious coffee
- Inexpensive espresso machine alternative
- Quick
- Easy to clean
Cons:
- Learning curve
- Needs your attention for the entire brewing process
2. French Press
The French Press is popular for its ease to learn and use, affordability and it’s nice and compact – doesn’t take up too much space in the kitchen.
Grind
Start with a coarse grind setting (#8) approximately the size and texture of kosher salt. The particle size should be flaky, with visible chunks.
Directions
- Measure 2 grams for every ounce of water or 2 generously heaping tablespoons of ground for every 5 ounces of water.
- Bring water to a boil and pour a small amount into the press to pre-heat.
- Let the water drop to 200 degrees, about 2 minutes off boil.
- Pour out water used to pre-heat, pour in measured ground coffee, and pour the water to saturate grounds.
- Start timer. At one minute, gently stir dry cap with a spoon to completely saturate coffee in water. Place the top over the press.
- At 4 minutes, slowly press the coffee.
- Serve and enjoy.
Note: Experiment with a finer grind for a more intense brew, or a coarser grind for a less intense brew.
Pros:
- Easy to use
- Easy to clean
- Quick
- Inexpensive
Cons:
- Tends to be inconsistent flavor
- Over-extraction can occur easily
3. Chemex
This one definitely isn’t for beginners. However, once you get the hang of it, the yield from one brew will make it all worth it.
Grind
Start with a medium-coarse grind (#7.5), slightly finer than the texture of kosher salt. The particle size should be flaky, with visible chunks.
Directions
- Measure 2 grams for every ounce of water or 2 generously heaping tablespoons of ground for every 5 ounces of water.
- Separate 3rd and 4th layers of filter and place in Chemex pot.
- Bring water to boil and pour a small amount of water (approximately 4 ounces) through the filter-lined cone to rinse the paper filter and warm the pot below.
- Let the water drop to 200 degrees, about 2 minutes off boil. Empty the water that was used to rinse the filter and warm the pot.
- Place ground coffee in the rinsed and filter lined cone and pour a small amount of water (approximately 4 ounces) over the grounds to create saturate and create a bloom. Wait 45 seconds.
- As the bloom settles, continue the pour as slowly as possible, stopping the pour as necessary so that the water never reaches above the original bloom volume. This will require stopping the pour every 15–30 seconds. Pour slowly and in a circular motion, with the goal of dispensing the total water used to brew in 3–4 minutes.
- Remove the used filter and coffee and swirl the brewed coffee for 10 seconds.
- Serve and enjoy.
Note: If the brew time is less than 3–4 minutes and the taste is weak, experiment with a finer grind. If the brew time is more than 3–4 minutes and the taste is bitter, experiment with a coarser grind.
Pros:
- Depending on the size, it can yield large amounts
- Unique, clean tasting coffee – full flavor profile
Cons:
- Fragile design
- Learning curve
- Tricky to clean
4. Hario
There’s a reason this Japanese pour-over method is a popular one. It’s simple, elegant and delivers fresh, delicious coffee with ease.
Grind
Start with a medium-fine grind (#5.5), somewhere between the texture of granulated sugar and couscous.
Directions
- Measure 1.5 grams for every ounce of water or 2 heaping tablespoons of ground for every 5 ounces of water.
- Place paper filter in cone over cup or pitcher.
- Bring water to boil and pour a small amount of water (approximately 4 ounces) through the filter-lined cone to rinse the paper filter and warm the server below.
- Let the water drop to 200 degrees, about 2 minutes off boil. Empty the water that was used to rinse the filter and warm the server.
- Place ground coffee in the rinsed and filter-lined cone and pour a small amount of water (approximately 4 ounces) over the grounds to saturate and create a bloom. Wait 45 seconds.
- As the bloom settles, continue the pour as slowly as possible, stopping the pour as necessary so that the water never reaches above the original bloom volume. This will require stopping the pour every 15–30 seconds. Pour slowly and in a circular motion, with the goal of dispensing the total water used to brew in about 3 minutes.
- Remove the used filter and coffee and swirl the brewed coffee for 10 seconds.
- Serve and enjoy.
Note: If the brew time is less than 2:30–3 minutes and the taste is weak, experiment with a finer grind. If the brew time is more than 3–3:30 minutes and the taste is bitter, experiment with a coarser grind.
Pros:
- Compact and stylish
- Easy
- Smooth coffee finish
- Inexpensive
- Easy to clean
Cons:
- Needs special filters
- Not as rich in flavor
- Learning curve with pouring the water
5. Aeropress
Fun fact: the Aeropress was invented by Alan Adler, founder of Aeropress – formerly known as Aerobie, a company specializing in outdoor flying discs and sports toys including the Aerobie Pro flying ring, which was used to set a Guinness World Record for farthest thrown object (at a distance of 1,333 feet to be exact). ALSO, that record happened to be set by Erin Hemmings, who grew up here on the Mendocino Coast!
The Aeropress is a unique way to get a quick cup of coffee on the go, and it’s so easy to bring with you anywhere.
Grind
Start with a medium-fine grind (#5.5), somewhere between the texture of granulated sugar and couscous.
Directions
- Place paper in black filter cap and lock onto brew chamber, place over cup.
- Bring water to boil and pour a small amount of water (approximately 4 ounces) through the filter-lined and capped brew chamber to rinse the paper filter and warm the server below.
- Let the water drop to 200 degrees, about 2 minutes off boil. Empty the water that was used to rinse the filter and warm the server.
- Fill brew chamber to just below the “1” mark with coffee.
- Pour approximately 2 ounces of water onto the ground coffee in the brew chamber. Start timer.
- Wait 30 seconds for the bloom to settle.
- Slowly fill with water to just above the “4” mark, stir gently, and wait one minute.
- Place plunger and slowly plunge brew into cup.
- Serve and enjoy.
Pros:
- Easy to travel with/pack up
- Can brew coffee, espresso and cold brew
- Quick
- Easy
Cons:
- Small yield, 1-2 servings
6. Melita/Cone
Grind
Start with a medium-coarse grind (#7.5), slightly finer than the texture of kosher salt. The particle size should be flaky, with visible chunks.
Directions
- Measure 2 grams for every ounce of water or 2 generously heaping tablespoons of ground for every 5 ounces of water.
- Place paper filter in cone over cup.
- Bring water to boil and pour a small amount of water (approximately 4 ounces) through the filter-lined cone to rinse the paper filter and warm the cup below.
- Let the water drop to 200 degrees, about 2 minutes off boil. Empty water used to pre-heat cup.
- Place ground coffee in the rinsed and filter-lined cone and pour a small amount of water (approximately 4 ounces) over the grounds to saturate and create a bloom. Wait 45 seconds.
- As the bloom settles, continue the pour slowly, stopping the pour as necessary so that the water never reaches above the original bloom volume. Pour slowly and in a circular motion, with the goal of dispensing the total water used to brew in 3-4 mintues.
- Serve your fresh brewed coffee and enjoy.
Note: Experiment with a finer grind for a more intense brew, or a coarser grind for a less intense brew.
Pros:
- Easy to travel with/pack up
- Can brew coffee, espresso and cold brew
- Quick
- Easy
Cons:
- Small yield, 1-2 servings
7. Cold Brew
What is Cold Brew?
Cold coffee is the chilled-out variant of the hot coffee you know and love. More then just a cooler brew, cold coffees have their own distinct flavor profiles due to the differences in how the essential oils are extracted from the coffee bean; cold and slow vs. hot and fast.
Most coffee retailers use hot-brewed coffee in their iced coffee drinks because it is faster/easier. They will typically brew hot with twice the amount of grounds for a double-strength concentrate that can be refrigerated and diluted. Unfortunately, this method completely misses the many benefits that cold-brewed coffee has to offer.
Cold-brewed coffee is 67 percent less acidic than coffee that is hot-brewed.
How It's Made
Cold-brewed coffee is made by soaking coffee grounds in cold water for 12 or more hours, usually brewed overnight. This method allows for a slow extraction of the coffee’s flavor, producing a super-smooth brew that has 67% less acidity than conventional hot-brewed coffee. This means that cold-brewed coffee is less bitter and easier on sensitive stomachs.
In addition to being smooth and low on acidity, cold-brewed coffee keeps for significantly longer with no loss of flavor. By brewing cold, the flavor compounds within the coffee are more stable and won’t degrade as quickly as hot brewed coffee, which can become overly bitter in a matter of hours.
A batch of cold-brewed coffee can last for up to two weeks.
Cold-brewing offers an alternate way to enjoy our delicious coffees. Try your favorite coffee brewed cold and taste the difference for yourself.
Pros:
- Smoother, less bitter than hot-brewed coffee
- Refreshing summer beverage
Cons:
- Long brewing time
We hope you learned something new! Did you find a new brewing method to try, or confirm that your current favorite is the only way? Let us know! Remember to follow us on social for more brewing tips and to join the conversation.
Coffee Tips: Part II - 7 Ways to Brew Your Coffee
read more -
![Coffee Tips : How to Brew Coffee]()

BREWING COFFEE
To brew a truly great cup of coffee, it helps to start with the fundamentals. Before we get into specific brewing methods for your ‘just cup,’ let’s revisit the core principles that make every method work best.
Here are the 5 key elements to keep in mind when you're brewing...
1. Coffee to Water Ratio
“What? I’ve just been pouring copious amounts of grounds into a filter and adding a few cups of water.” I’d like to think we’ve all been there. At least I have, before I started working at Thanksgiving Coffee Company. But hopefully we caught you early enough to steer you in the right direction. 😉
Using the correct amount of coffee will ensure that your coffee is brewed to strength, without over-extracting or under-extracting the coffee to compensate for an inappropriate dose. While we do recommend weighing 2 grams of coffee for every fluid ounce of water, we understand that not everyone has a scale at home. And if you don’t, just estimate about 2 heaping tablespoons of ground coffee for every 5 ounces of water used to brew.

2. Grind Size (yes, this again)
This is one of the most important steps in coffee brewing. In general, a finer grind will produce a more intense brew and a coarser grind will produce a less intense brew. At the same time, a grind that is too fine will produce an over-extracted, astringent brew, and a grind that is too coarse will produce a weak, under-extracted brew lacking flavor. In pour-over methods, grind size also affects the rate of extraction, as water will pass more slowly through a finer grind, and more quickly through a coarser grind. We strongly recommend burr grinders over blade grinders. For more information on this, see our last blog “How to Grind Coffee“.

3. Water Temperature + Quality
This one is a little bit more straight-forward. Water temperature dramatically affects the extraction of coffee’s flavor during brewing. We recommend brewing with water at 200° Fahrenheit for best results. Using fresh, clean, chlorine-free water is essential.

4. Coffee Freshness and Storage
Coffee is very sensitive to heat, moisture, and oxygen. It should be stored at room temperature in an airtight container. For best results, grind coffee fresh, just before brewing.
Staling is caused, in order of most harmful to least harmful
- Exposure to air (Oxidization)
- Exposure to heat
- Exposure to moisture
- Exposure to light
…and, if you address the problems of Air, Heat, and Moisture correctly, then Light will have little effect on your coffee. Read more about storing your coffee here.

5. Cleaning
This is the last one – of the basics – and it’s pretty easy. Because coffee contains numerous oils that build up over time, we recommend thoroughly cleaning your brewing and grinding equipment after each use. This guarantees the best, freshest cup of coffee every time.

So there you have it: all the basics of brewing a great cup of coffee. Now you're ready to explore all of the brewing methods: from stovetop espresso to cold brewing. Enjoy!
Learn more: Coffee 101 blog posts
Coffee Tips : How to Brew Coffee
read more -
![Coffee Processing : Dry versus Wet]()

Coffee Processing: Dry versus Wet
There are countless variables that contribute to the complex flavors of your favorite coffee before it even reaches your cup. Many people know that the country of origin, coffee tree varietal, and roast color have an immediate impact, but fewer people know about the on-the-farm processing methods that also play a huge role in the flavor profile of the finished product.
DRY PROCESS
The ripe cherries are picked and immediately put on the drying patio in the sun to dry. The skin and pulp remain attached. The skin shrinks, locking the fruit sugars in. The cherry raisins up and drys hard around the seeds. The mass, when hard and dry, is milled (like white rice) to remove the hardened pulp and skin.
The taste produced is sort of like blueberries or strawberries as the fruity flavors penetrate the porous seeds within. A mix of sweet and sour fruit. The acidity is softer and mellower.
WET PROCESS
When the cherries are ripe they are picked, the skins and pulp removed mechanically, and the seeds are wet and slippery, gooey with a honey-like outer taste. They are allowed to sit, slightly fermenting in the heat of a day/night rest in contact with each other. They are then soaked for 12-36 hours in a water bath, washed, and removed to drying patios where they will dry down to about 11-12% moisture over a 2-4 day period.
The wet process produces a citric-like acidity or brightness with a slightly lemony flavor. In the extremes like coffees from Guatemala and Ethiopia and Kenya, the brightness is palatable. However, wet process coffees produce a softer plum-like acidity as well. Wet process coffees are more forward on the -palate than their brothers and sisters of the Dry Process.

We produce two blends that combine these processes into one flavor profile: Mocha Java Blend and Paul’s Blend. However, these Ethiopian coffees presented to you today are the most clarifying examples of two on-the-farm processes. These distinctive flavor profiles are not caused by varietal differences, country of origin or agricultural practices.

In this offering, we allow you to taste the words on this page. Try them straight at first and then see how they taste as a 50/50 blend or any combination. I prefer my coffee a bit on the fruity/ jammy side so I use a 70/30 blend with the Dry Process in the majority. But the reverse will do quite well for those who prefer a bright and lively acidity on the citric side but want a bit more body and fruit. Enjoy!
We would like to acknowledge Hasbean Coffee in the UK for their excellent videos about coffee processing.
Coffee Processing : Dry versus Wet
read more -
![Iced Lavender Latte Recipe]()

Iced Lavender Latte Recipe
Iced Lavender Latte
Ingredients:- 1 shot espresso
- 4-6 oz. milk or milk alternative (oat, almond, soy)
- 1-2 tsp lavender flavoring
- 2 drops purple food coloring (optional)
- dried lavender for garnish (optional)
To make the lavender milk – pour about 4 oz of milk or milk alternative into a glass or container, adding in 1 tsp of lavender flavoring and purple food coloring. stir, or use milk frother for a fluffier finish.
Add ice into a new glass, and add in your espresso. Pour your lavender milk over the espresso, add in more lavender syrup to taste, and garnish with dried lavender.
Enjoy!
Iced Lavender Latte Recipe
read more -
![Brew Your Espresso]()

You read that right, Brew Your Espresso!
What exactly is espresso? It is the highest form of coffee. By definition, it’s strong black coffee made by forcing steam through grounds. For a more extensive description, we dedicated a whole blog post to what exactly espresso is.
The common misconception of requiring a fancy, expensive espresso maker can discourage many of us from brewing it ourselves at home.
Although our espresso blends are designed for that high-pressure extraction that an espresso machine delivers, they can be equally as satisfying when brewed like any other coffee blend.
The proof is in the… coffee. We made a 1-minute Bialetti Stovetop tutorial video as well as a French Press tutorial using the same espresso blend – with instructions from our brewing guide page. It really is as easy as it looks, and the whole process only takes about 5 minutes to complete.
To help you start your home espresso-brewing journey, we’re giving you 10% off our Italian Espresso Blends all throughout April!
Our Northern Italian Style Espresso, featured in our tutorial videos, is a delightfully smooth espresso, not at all toasty or burnt-like, but intense enough to show up and vote in a latte or cappuccino when properly pulled.
For a more intense, pungent blend, try our Southern Italian Style Espresso. The blend consists of equal parts Guatemalan, Ethiopian, and Indonesian coffees. These are some of the finest coffees in the world, roasted dark to express a smoky punch, deeply toned notes of licorice, chocolate, and earthy sweetness.
Happy brewing!
Brew Your Espresso
read more -
![Grinding Coffee at Home]()

Grinding Coffee at Home
Grinding coffee at home is an excellent way to improve your coffee experience. The fresher your coffee is when you brew it, the better it is going to taste. To help you get the most flavor out of your coffee beans, this post will cover a variety of methods to show how anyone can grind their own coffee at home. But first, let’s cover the…
Grind basics
Regardless of what you are using to pulverize your perfectly roasted beans into grounds, there are a few basic principles to keep in mind:
Grind Size
Using the correct particle size in ground coffee is one of the most important steps in coffee brewing. In general, a finer grind will produce a more intense brew and a coarser grind will produce a less intense brew. At the same time, a grind that is too fine will produce an over-extracted, astringent brew, and a grind that is too coarse will produce a weak, under-extracted brew lacking flavor.
Not sure what grind size to use? Here’s a handy guide:
COARSE (looks like Kosher or sea salt)
Cold Brew Coffee, French Press, Percolator, Coffee CuppingMEDIUM (looks like sand particles)
Pour-over Brewers, Auto-Drip Coffee Machines, Aeropress (with 3+ minute brew time)FINE (looks a bit finer than granulated sugar)
Espresso, Moka Pot (Stovetop Espresso Maker), Aeropress (with 1 minute brew time)Consistency
The size of the grounds should be consistent or uniform, meaning you don’t want to see large bits and super tiny bits in your grind. The reason: it is easier for smaller particles to become water soluble than larger ones. If there is a wide variety in the size of the particles in your coffee grinds, there will be a wide variety in the extraction time of your brew. The more consistent your grind size, the easier it is to extract the full flavor from your brewed coffee.
Now that we’ve got the basics covered, the next step is how to get the best grind at home!
HOW TO GRIND YOUR COFFEE
The Burr Grinder
Burr grinders are made of two burred plates with ridges that draw in and crush / grind the beans to a uniform size. This is what the pros use, and with good reason. Burr grinders deliver the most consistent grind with the least amount of work on your part. Just fill up the hopper, turn the dial to your desired grind setting, and turn it on. A burr grinder will cost between $60 — $250 depending on what features it comes with.
The Blade Grinder
While not ideal, a blade grinder will do a fine job if you put in a little effort. The first thing to remember is to pulse grind. Don’t grind all the coffee beans needed for your brew at once, instead, grind smaller quantities and pause regularly to shake the grinder. This will loosen all the bits and help you get a more uniform grind.
Take your blade grind to the next level: Got a sieve?
Sift the grounds through your sieve until you are left with just the large pieces. Then grind those large bits again until you are left with just medium and small grinds.
Pro-tip: Use a paper towel to get rid of the ‘fines’
‘Fines’ is coffee lingo for the tiniest powdery particles in ground coffee. Too many fines will leave your coffee tasting bitter and over-extracted. A nifty trick to get rid of them is to dump all of your grinds onto a paper towel and then rub them down into the paper towel with your fingers. A few passes is all it will take. Then gently transfer the grinds onto a plate (or right into your brewer). This will trap the powdery fines on the paper towel, leaving you with the best (most uniform and consistent) grind possible from a blade grinder.
Grinding Coffee at Home
read more -
![Coffee 101 : How to Store Your Coffee]()

How to store your coffee to keep it fresh and as tasty as the day it was received:
Staling is caused, in order of most harmful to least harmful
- Exposure to air (Oxidization)
- Exposure to heat
- Exposure to moisture
- Exposure to light

AIR
Roasted Coffee beans are composed of approximately 800 organic chemical compounds. Many of these organic compounds create the flavor you love.
There are sugars, alcohols, acids, Ketones, Aldehydes, minerals and all sorts of volatile flavonoids and antioxidants. When these organic compounds are exposed to air, many of them will combine with the Oxygen, forming new organic compounds that don’t taste good. The coffee becomes flat, losing its brightness and personality. This doesn’t happen immediately– it begins when you open a vacuum packed bag and the process continues on for about a month. The great flavor of high-quality coffee lasts longer at first but their fall over the cliff is more dramatic then lesser coffees. This is because the taste of lesser coffees when fresh often resembles stale coffee.
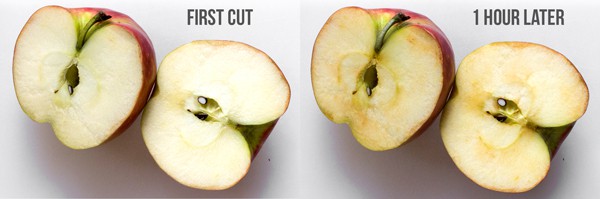
The Oxidization process is clearly observed as a freshly cut apple browns over time
Recommendations:
- Don’t open the vacuum bag until you are ready to use its contents.
- Close the bag and within the first three days, transfer the coffee into an airtight container. No need to purchase an expensive kitchen accessory. Just use a quart mason jar and seal it with a lid.

HEAT
All chemical reactions are speeded up by heat, so we want to keep the coffee at a low temperature. That will go a long way in saving the flavor.
Oxidation can be slowed down or speeded up. Temperature is the factor and since Staling is caused, essentially, by oxygen combining with other compounds, we want to keep the beans cool but not frozen.
Recommendations
- Store your sealed container in a cool dark pantry or in the refrigerator. If you have ordered a five-pound bag, you will need five quart-sized jars and lids.
- Cool is better than room temperature. Since warm air rises, store your sealed containers on your lowest shelves.

MOISTURE
Your coffee beans are pretty devoid of moisture. When we put green raw beans into the roaster they are about 11% moisture. When they exit the roaster after being at high heat (400-465 degrees) they are really dry. But like a dry sponge, they will attract moisture from the air. This is Osmosis. Moisture softens the beans and further enables organic compounds to combine and change, reducing flavor and speeding up the oxidization process.
Recommendation:
- Do not store the beans in the original vacuum packed bag for more than a few days unless you have a heat sealer. Moisture creeps into the bag easily, and even more when it is in the freezer or refrigerator.
- A sealed container is the answer to moisture.

LIGHT
It takes an awful lot of light to make coffee stale; if you address the air, heat, and moisture issues, then the light will become a small factor. On it’s own, in my experience, light alone will take a long long time to damage coffee beans. However, if coffee beans are exposed to prolonged sunlight, then heat becomes the primary culprit.
Recommendation:
If you address the problems of Air, Heat, and Moisture correctly, then Light will have little effect on your coffee.
Coffee 101 : How to Store Your Coffee
read more -
![Springtime for SongBirds]()
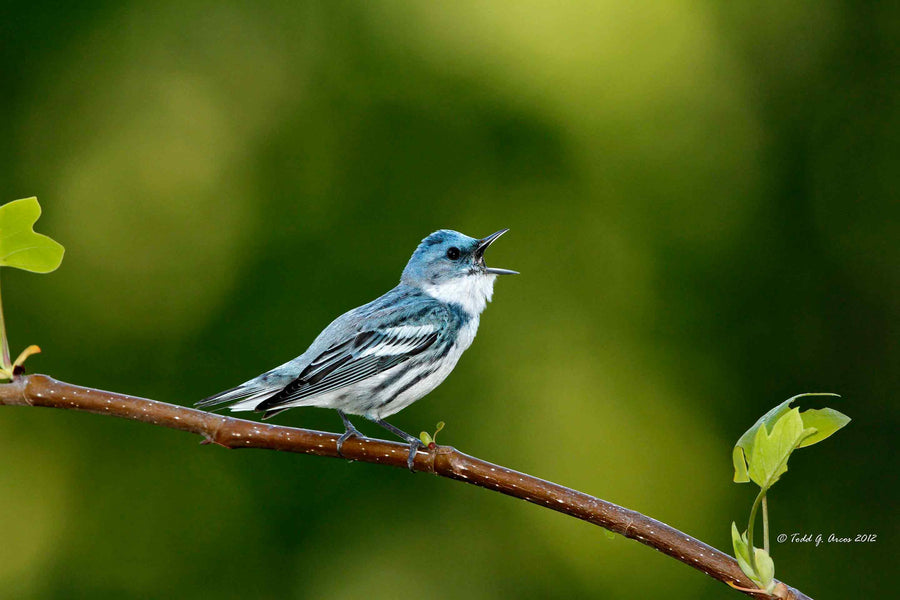
The best coffee is grown the traditional way— slowly, under a canopy of shade from taller native hardwood trees. Shade-grown coffees are carefully tended, harvested, and processed by people who know and love coffee, and who depend on it for their livelihoods.
Traditional shade-grown coffee really is a win for everyone: amazing coffee flavors, a fair wage for the coffee farmers’ hard work, and a lush natural habitat for migratory birds. So much good comes from a just cup of coffee.
The History of Shade Grown
By 1996, the United States forests had run out of hardwoods such as oak, ash, maple, cherry, and all the wild fruit and nut trees. These are important woods used in furniture making, home building, veneers for plywood, doors, window frames and a host of other minor but important uses.
The timber industry needed another source of hardwood, so they targeted the temperate rainforests where coffee was grown. The coffee tree is a shade loving plant that withers in the sun and needs shade to be a healthy producer of the coffee fruit. Mahogany and a dozen other hardwood varieties were there for the loggers if only they could convince coffee farmers to cut down their trees.
The destruction of these native hardwood forests is a long story of deception. Governments, in collaboration with multinational corporations, set out to convince farmers to grow their coffee in the sun, claiming that yields would increase and incomes would rise.
Without the leaf litter from the big hardwood trees to fertilize the soil every year coffee trees at Nicaragua Coffee Farms would need oil-based fertilizers. This is how the petrochemical companies became involved. Now with more sunlight reaching the ground, weed killers would become essential. This is how herbicide producer Monsanto became involved. Without the forest habitat for migratory songbirds, natural pest controls were lost. This is how the need for chemical pesticides became essential.
The big chemical companies found new markets and the timber companies gained new inventories of almost unlimited, inexpensive hardwoods. The coffee farmers paid for all this with higher costs, lower quality coffee, toxins entering the water supply, and a 90% loss of biodiversity on their farms.
At least half of all coffee grown in the northern neotropics has already been converted to full-sun plantations.
Preserving these precious jungle forests not only protects biodiversity, but it’s also our greatest asset in mitigating the effects of climate change.
The Smithsonian’s Bird Friendly® certification is the most rigorous environmental certification possible for coffee, and the only one that justifies the use of the much-abused term “shade-grown.”
Based on years of scientific research, the SMBC has developed strict criteria for evaluating shade coffee farms. An independent, third-party inspector determines whether a farm meets these criteria or not. Only those farms that also meet organic certification standards are eligible to be certified Bird Friendly®.Try One of Our Songbird Coffees
Protect biodiversity, with your morning Cup
Like us on Facebook and follow along on Instagram and Twitter for frequent updates, promotions, giveaways and more!
Springtime for SongBirds
read more -
![What is Espresso?]()
Es·pres·so – /eˈspresˌō/
noun: espresso; plural noun: espressos; noun: expresso; plural noun:
1. strong black coffee made by forcing steam through ground coffee beans.
from Italian (caffè) espresso, literally ‘pressed out (coffee)’.

The Upsetter Espresso has been named a Good Food Award Winner, and it seems like a great time to talk about espresso roasts and perhaps clarify what that means. So let’s start with the basics:
What is espresso?
Espresso is coffee of Italian origin, brewed by expressing or forcing a small amount of nearly boiling water under pressure through finely-ground coffee beans. Espresso generally has more body than coffee brewed by other methods, has a higher concentration of suspended and dissolved solids which gives it a satiny mouthfeel, and has crema on top, which is a foam with a creamy consistency. As a result of the pressurized brewing process, the flavors and chemicals in a typical cup of espresso are very concentrated. Espresso is also the base for other drinks such as a caffè, latte, cappuccino, caffè macchiato, caffè mocha, flat white, or caffè Americano.
What is an espresso roast?
 Espresso is both a coffee beverage and a brewing method. It is not a specific bean, bean blend, or roast level, though it is more finely ground. An espresso roast is simply a way of roasting any green coffee with the intention of it tasting good brewed as espresso. Any bean or roasting level can be used to produce authentic espresso. For example, in Southern Italy, a darker roast is generally preferred. Farther north, the trend moves toward lighter roasts, while outside Italy a wide range is popular.
By lightly roasting a blend of high quality coffee beans from three different countries of origin, our Roastmaster developed a new espresso flavor profile; one with deeper complexities than many darker roasts.
What is the difference between espresso beans and coffee beans?
This is a question that we hear in various forms all the time. Fortunately, our friends over at Earl of Coffee made a fantastic post that covers this question in detail!
Can I use an espresso roast in my home brewer?

The Upsetter Espresso has been named a Good Food Award Winner, and it seems like a great time to talk about espresso roasts and perhaps clarify what that means. So let’s start with the basics:
What is Espresso?
read more -
![Water is the Main Ingredient in a Good Cup of Coffee]()

Most people who love their coffee go to great lengths to get exquisite beans, a capable burr grinder, and an expensive device for brewing.
For some reason, however, they never seem to give the water a second thought. The truth is that water constitutes more than 98 percent of the final drink. Perhaps we ought to see it as the most crucial ingredient in a cup of coffee.
I had been a coffee geek for years before I realized the importance of water. Once I finally understood the role of water in coffee extraction it changed my brewing for good
Water chemistry can get pretty complicated, so this is my attempt to boil the most important aspects down to some actionable advice, so you can also brew better coffee at home.
Water is more than H2O
Water is water. It’s everywhere in our daily life, and we never give it a second thought. Sure, you can get some fancy mineral water in the supermarket, but that’s just marketing. Right? Well, it probably often is, but there’s also some truth to it. Water is a lot more than just H2O when you study it carefully. It usually contains minerals, salts, and some impurities.
Depending on where you are in the world the water composition will be somewhat different. Rainwater percolates into the underground where it will go through layers of limestone and chalk. This process makes the water harder as it picks up minerals on the way.
You probably never thought about it, but it’s not uncommon that a single liter of water contains enough minerals that it equates to the size of a headache pill.
People who live in areas with much calcium in the water, however, already know this since they have to descale their electric kettle and bathroom tiles regularly.
The science
One of the things that has become apparent in the specialty coffee community in recent years is that water isn’t just an ingredient in coffee.
The water – or rather the minerals in it – also acts as an extraction agent that pulls the delicious compounds from the coffee beans and into the cup.
The British barista champion Maxwell Colonna-Dashwood and chemist Christopher Hendon did a research project a few years ago that shed some light on the process.
It turns out that magnesium and calcium are the two most important minerals when it comes to coffee extraction. Especially, magnesium is vital if you want to be able to taste the fruity and lively flavors of light roasted coffees.
It could be tempting to think that more minerals equate better coffee but that isn’t the case, argued Hendon and Colonna-Dashwood in their research paper. Instead, there is a sweet spot where minerals and a buffer are balanced to create the ideal water.
When their book, ‘Water for Coffee,’ was published it made headlines within the specialty coffee community.
However, beer brewers had been aware of the importance of water for centuries. In fact, that’s the reason why beers from London, Prague, and Brussels historically had their own style.
Test your water
So how do we boil all this science down to some actionable advice? Well, luckily you don’t have to study water chemistry to start making better coffee.
One thing you can do today is to stop using hard water for brewing coffee if you live in an affected area. You should be able to obtain this information from your local water station easily. Otherwise, you can buy a cheap TDS pen online (I recommend the Xiaomi brand) and measure it yourself. Unfortunately, the majority of Americans have hard water in their taps.
To find out if a certain water is right, you can check the label and see what the amount of total dissolved solids (TDS) is. If it’s between 50 and 150, the water will most likely be great.
However, if the water has a TDS score from 0 to 20 – which is typically the case with reverse osmosis water – it will not be ideal for brewing. The flavor compounds of the beans need some minerals to adhere to in order to be extracted properly. The taste will be astringent and somehow artificial.
Soft water is better.
What if you have soft water in the area where you live? Then you’re one of the lucky ones.
You can probably get away with using a filter pitcher such as Brita. If you can find specific cartridges that convert calcium to magnesium, you should go for that.
It may sound like a lot of trouble to go through, but using the right kind of water makes a huge difference when brewing manually. If you’re still unsure whether it’s worth the effort, I’d encourage you to test it at home. Just brew a cup of coffee with tap water and bottled water and taste them next to each other. The difference should be obvious.
If you already care about buying freshly roasted coffee and have the right equipment, this last step will take your cup from good to great.
About the Author: Asser Christensen is a Danish journalist. These days he mostly writes about coffee. He is a certified Q Arabica Grader with the Coffee Quality Institute. His work has been published in a range of newspapers and magazines in his native country, Denmark, as well as internationally. You can follow his coffee journey at his personal blog: ‘The Coffee Chronicler.’ If you already care about buying freshly roasted coffee and have the right equipment, this last step will take your cup from good to great.
Water is the Main Ingredient in a Good Cup of Coffee
read more -
![Espresso Blends: Softened Acidity + Heavy Body]()

Here we are with another Coffee 101 post! Our subject today is espresso.

You may have scrolled past our espresso blends in the past, on the hunt for the newest single origin to try. We don’t blame you, we also search out the best in limited edition and micro lot single origins. But while we love these excellent coffees, this post is about something different. We want to tell you why we love espresso blends, brewed at home without the use of an espresso machine.
What is a Coffee Blend?
 Need a quick overview on the coffee blend? It’s simple: two or more origins, mixed together. Creating a coffee blend is an art form. You have to understand and appreciate the nuances in different coffees, and bring the flavors together to be transformed into a more complex cup of coffee. With 46 years of history sourcing coffee from all over the planet, we have a unique relationship with the coffees arriving at our roastery, and can create some truly spectacular blends with the coffees we receive.
One thing that’s special about a blend is the subtle shifts in flavor that we create to maintain freshness. We regularly modify the recipes for our blends, adding in our latest arrivals of coffee, while keeping a consistent flavor profile.
Espresso Blends
Now let’s talk espresso. What makes an espresso blend different from any other coffee blend?
Our four espresso blends have certain characteristics: softened acidity, a smooth experience throughout the cup, and a heavy body with a really spectacular aftertaste. These traits are specifically built into the blend for the purpose of pulling a superb espresso shot, but using our espresso blends in your home brewer also makes an equally excellent cup of coffee.

One of our favorite things to do at Thanksgiving Coffee, is to encourage you to try new things. The world of coffee is vast, and there is no way any one person would be able to try all the amazing coffees out there. What we do have is the opportunity to experience and taste more than ever before as our world becomes better connected, and we love bringing these alternative coffee options to you.
Every sip of coffee is a new experience, and we are honored to be a part of your coffee rituals.
Espresso Blends: Softened Acidity + Heavy Body
read more -
![Mocha Java]()

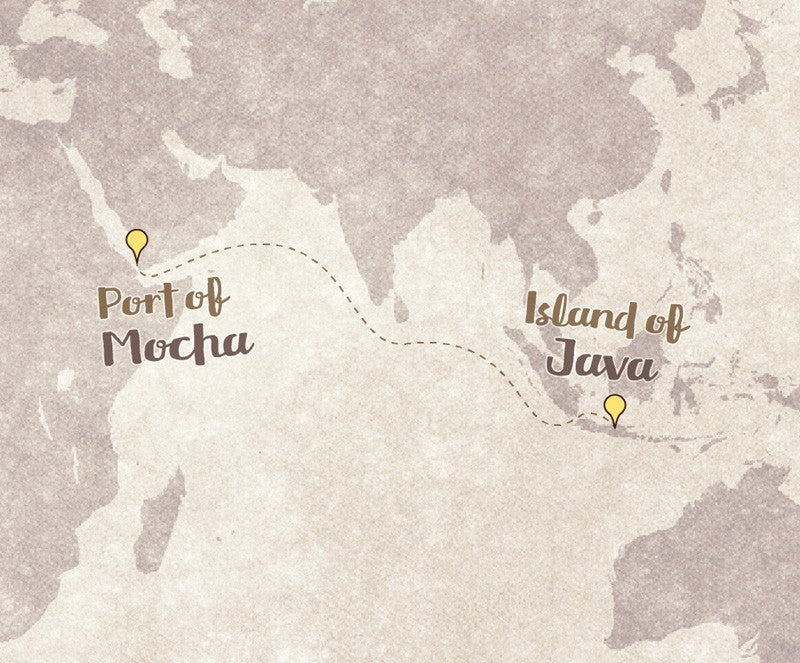
Mocha Java
If you’ve ordered our classic Mocha Java in the past few days, you may have spotted a difference in our packaging. Our new label design features a map that illustrates the story behind Mocha Java. In this blog post, we’re going to give you a little history lesson—so pour a cup of java (or grab yourself a mocha?) and have a seat.
While the word “mocha” may also refer to your favorite chocolate-y drink, that is not what we’re referring to in today’s post. Mocha Java is a historic blend of two origins an ocean away from each other: Indonesia and Yemen.

The History of Mocha Java
Back in the 1400s to 1600s, the majority of Europe’s coffee intake came out of the Red Sea, from the Port of Mocha [Makha or Mokha]. This coffee was grown in the country of Yemen, but was referred to by the name of the port from which it came. In the Pacific Islands, it was the same story. Most Indonesian coffee was coming out of a port on the island of Java, controlled by the Dutch East India Trading Company. This led to the term “java”, which has remained as slang for coffee to this day.
These two ports caffeinated most of the coffee-drinking world in those days, and trading ships passed through both on the same trip. Although 5,000 miles separated them, coffee from Java and Yemen lived together on the sailing vessels that made their way across the Indian Ocean and back to Europe. These two origins came together as the very first blend in the world of coffee, and it’s a combination that roasters continue to emulate.
Mocha Java Today
These days, your typical Mocha Java has a few slight variations. Most roasters (and coffee enthusiasts) prefer Indonesian coffee to be sourced from Sumatra, the next island over from Java. On the Middle Eastern side, buyers will often source their “mocha” from the African country of Ethiopia, across the Red Sea from Yemen.
This is the case for our own homage to Mocha Java. For the Thanksgiving Coffee Mocha Java blend, we source our “java” from farmers in the the Takengon region of Sumatra, Indonesia. Our “mocha” is a natural-processed coffee that comes from farmer cooperatives in Yirgacheffe, Ethiopia. Our Mocha Java is a coffee that we’ve perfected over decades of roasting, and we strive to maintain its consistency.
The history of Mocha Java is a history of the coffee world as a whole. The coffee industry has changed significantly over the past five centuries, and we love looking back and researching where it all came from. Next time you brew up a cup of our Mocha Java, take your time drinking it, because you are sipping a truly historic coffee.
Mocha Java, Deconstructed
Now that you know the background of the Mocha Java, you have the opportunity to create your own. Our organic Sumatran Coffee is available in two roast colors, and we have three different organic Ethiopian coffees that you can choose from online. You can mix up the “mocha” and “java” to create your own perfect blend.
Mocha Java
read more -
![Coffee 101 : Roast Colors - What do They Mean?]()

Roast Colors: What Do They Mean?
It’s time to get educated.
Whether or not you have a go-to coffee, you probably have an idea of what you like. Something with a smoky taste, so you can add a splash of milk; or perhaps something on the sweeter side for your cold brew. We want to help you dig in a little deeper and learn more about every one of the roast colors, and what you’re tasting in your cup of coffee!
For each roast color, we’re highlighting a coffee that is really standing out right now. These recommendations come straight from our Roastmaster and Roastmaster Emeritus on what coffee they’re drinking these days. However, we DO want to encourage you to go outside the box, and take a look through all the coffees and roast colors on our website–try a variety to find that perfect cup!

Light Roast Coffee
Nuanced • Bright • Lively
In the lighter roasts (both light and medium), you can taste the nuance and impact of terroir. If you’re a single origin lover, these coffees are your go-to. With a light roast especially, the specific qualities unique to the coffee’s origin stand out. If you’re sticking with Vienna and French roasts (the darker beans), you have to work harder to tell the differences between origins. With light, it’s all there in the first sip.
For those of you that cup your coffee and take the time to taste every flavor, the lights and mediums are probably the roasts for you. When purchasing a single origin coffee, the great ones are best at this roast color.
Light Roast Recommendation
 Our Nicaraguan Flor de Jinotega is really making an impact right now. We received a fresh crop as of the beginning of June, and it’s tasting nutty, chocolaty, smooth and sweet. A really pleasing cup!
Medium Roast Coffee
Nutty • Spicy • Balanced • Fruity
Roasted about 20 degrees Fahrenheit higher than the light, the color on a medium roast coffee bean shifts into a chocolate brown. As you move from the light roast to the medium, the bright and lively acidity morphs into a smoother, deeper, and more balanced mouth feel. In every sip of a medium roast, you’ll find that a certain mellowness and maturity prevails.
Medium Roast Recommendation
 Thanksgiving Coffee has many medium roasts that stand out, but our Fairtrade and Organic Mocha Java is a classic that we love more and more every time we brew it. This coffee has that balanced and nuanced flavor we referenced above, and was described as having a “delicately sweet aroma” by CoffeeReview.com, where it scored 90 points.
Dark Roast Coffee
Bold • Spicy • Chocolaty
The coffee bean color on our dark roast (sometimes called the Vienna roast) is still more brown than black. You could compare it to the color of baker’s chocolate. When this coffee is freshly roasted, the beans will have a shiny coat of coffee oils on their surface. The greatest dark roast coffees will have hints of carbonization, but shouldn’t be described as smoky or toasty — we’ll leave those descriptors to the very dark roast.
Dark Roast Recommendation
 The preferred dark roast of the Thanksgiving Coffee Roastery right now is our Congo Coffee. Just launched earlier this year, this single origin is changing the way we think of dark roasts. As you sip this coffee, you’ll notice rich notes of chocolate and spice, with a syrupy mouthfeel.
(Bonus Points: every purchase of our Congo Coffee benefits the Dian Fossey Gorilla Fund International!)
Very Dark Roast Coffee
Toasty • Smoky • Caramelized Sugars
Ah, the “French Roast.” This is the coffee that goes great with a splash of milk. The coffee bean color on our very dark roast is more black than brown, with rich and copious levels of surface oil. Roasted long and hot to produce deep carbony, smoky flavor notes. A well-made French roast will have caramelized sugar notes, licorice and roasted chestnut flavors, and a long wet (not ashy) finish.
Very Dark Roast Recommendation
 We recommend the Sumatra as our very dark roast selection for a very good reason: you don’t find many single origin coffees that are roasted to this color. It takes some work to create a French roast that still has the flavors and nuances of origin, and this coffee does that well.
As we sign off on our roast color education, we want to remind you of something: if you aren’t sure you’ll like it, give it a try! Are you regularly a French roast lover? Give medium a go. Religiously purchase the Bolivia Light Roast? Add the Rwanda Medium to your order this month for something new. The best way to develop your taste preferences is to get outside your box and liven up your selection.
Enjoy your roast color adventure!


Oh yes, you CAN blend different roast colors! Paul Katzeff created an app for all you iPhone users to explain this even more. It’s called Smart Coffee, and it was designed to help you blend roast colors, and create a flavor profile that is specific to YOU. Check it out!
Coffee 101 : Roast Colors - What do They Mean?
read more -
![Kona Cold Brew Marinade for Pot Roast]()

Kona Cold Brew Marinade for Pot Roast
From Lawrence Bullock
Here’s a cold brew marinade recipe for anytime when you have an extra bit of prep time. You will need a full 2 days for prep and another 10 hours for the slow cooker. It's worth it!
Cold Brew for the Marinade
From a 12 oz package of our Kona Blend coffee, use 1/4 cup of beans, ground coarse for French Press, in a 1 quart French Press in the refrigerator.
Add the ground coffee, and a quart of filtered water, and replace the plunger and lid. Don't press the plunger down till the brew is done.
Once the cold brewing was complete (12 hours) I press the plunger down, trapping the grounds. If you don’t have one of those, simply pour off the cold brew into a second container until you see the sludge.
Set the strained cold brew aside. Discard any solids left at the bottom, and you’re left with a concentrate of cold brew coffee. Add water to get to the desired volume.
The Pot Roast Recipe
I bought two chuck roasts. Chuck roasts are an inexpensive cut, but flavorful.
I put the cold brew into a container that I knew could contain the roasts and the cold brew. A lidded container is preferable, but if you don’t have one, use cling wrap to seal it off. Use enough cold brew to completely cover the meat.
Then place the meat, covered in cold brew, in the refrigerator for 24 hours. Once the cold brew marinade process is over, pour the leftover cold brew coffee into a container and set it aside.
As you can see, planning ahead is essential as two 24 periods are involved, and THEN a ten hour cook time... But it’s worth it.
Preparing the Au Jus
I then used the directions on a product called Johnny’s French Dip Au Jus. This product can be found in most grocery stores, or online, these days. You only need one little bottle, but I usually buy two and keep one in the pantry.
Johnny’s French Dip Au Jus contains: Water, Hydrolyzed Vegetable Protein (Corn, Soy, Wheat), Red Wine Vinegar, Tomato Paste, Worcestershire Sauce.
The basic recipe for the au jus, according to the label on the little bottle is two parts water to one part au jus. Instead of the recommended water, I used the cold brew that I had marinated the roasts in.
Using those directions, I ended up with 3 cups of au jus liquid. It pretty much covered the roasts. You can make more of the au jus if you wish. Make enough to cover the roast (or roasts) completely.
Discard any leftover marinade. Any product that has touched raw meat should be discarded if not used in a timely fashion.
Cooking the Pot Roast
I set the slow cooker to ten hours and let it cook. For ten hours.
A coffee-saturated roast beef was the result. The coffee flavor was evident but not overwhelming and taste tests went well. A wide rage of ages (15 to 67) tasted the roast at completion and enjoyed it.
You can add carrots, potatoes and any number of vegetables associated with standard pot roast recipes, but I chose to not include them in this recipe because I wanted to taste what a strict coffee au jus and meat only combination tasted like. I’m sure adding the vegetables would be just fine, and I’ll probably do that next time!
Kona Cold Brew Marinade for Pot Roast
read more -
![Hot Coffee, Cold Coffee: How Does Temperature Affect Taste?]()

Hot Coffee, Cold Coffee: How Does Temperature Affect Taste?
From Lawrence Bullock
Biologists have only recently started understanding how and why temperature affects the taste of food and beverages. No research has been conducted specifically regarding coffee. But there are three main theories; the first holds that lukewarm coffee tastes bad because cavemen didn’t have refrigerators.
Karel Talavera of the Laboratory of Ion Channel Research in Cuba has studied the way that taste receptors inside our taste buds respond to molecules at different temperatures. He and his colleagues found that certain taste receptors are most sensitive to food molecules in the 20 to 35 degree Celsius (68 to 95 degree Fahrenheit) range — in other words, molecules at or just above room temperature. The taste receptors in question don’t always register molecules much hotter or colder than this range, so we don’t taste them.
“This is still an obscure phenomenon that we cannot explain, but that could fit to the fact that taste perception does decrease above a certain temperature,” Talavera says. In short, hot coffee (around 170 degrees F) may seem less bitter than room-temperature coffee (73 degree F) because our bitter taste receptors aren’t as sensitive to bitter molecules in the coffee when those molecules are hot.
According to Talavera, our sensory systems tend to be designed by evolution to perform most effectively at the temperatures we are typically exposed to. “Our ancestors did not eat food at extreme temperatures,” he said. Their meals consisted of mostly foraged berries and freshly hunted meat in the 20 to 37 degree Celsius range — almost exactly the window in which our taste buds are most sensitive. Because piping hot or ice-cold coffee falls outside this realm of maximum taste, our taste buds don’t sense the drink’s true bitterness.
However, the temperature-dependence effect observed by Talavera and colleagues is more pronounced for sweet taste receptors than bitter ones, and so it may not be the only factor at work. Some researchers think tepid coffee’s bitterness has more to do with smell than taste. “Odors influence coffee flavor very strongly, and it is easy to go from sublime to horrible,” Paul Breslin, an experimental psychologist who studies taste perception at Rutgers University, wrote in an email. Even very bitter coffee, such as espresso, tastes great when hot because of its pleasant aroma, he pointed out.
According to Barry Green, a taste perception scientist at Yale University, hot coffee releases more aromatic compounds than room-temperature coffee, so it has a greater chance of impacting taste. He also said that milk, coffee’s frequent companion, tastes worse at room temperature, and a combination of these factors probably explains the nearly universal opinion that lukewarm coffee leaves something to be desired.
One last theory holds that hot coffee’s heat could be distracting us from its strong flavor. As Breslin put it, “It is possible that an attentional mechanism is at work. You do not think about how bitter or sweet [coffee] is when it is hot or cold. Hot coffee may force you to think about temperature, which is a bit of a distraction from its bitterness.”
None of the researchers profess to fully understand coffee’s temperature-dependent deliciousness, but it seems to be at least slightly, only a matter of opinion.
Below: A photo featuring both hot coffee and cold coffee from one of our cafes, The Good Earth Coffee and Tea House in Oroville, California!

Hot Coffee, Cold Coffee: How Does Temperature Affect Taste?
read more -
![Micro-Lot Coffee]()
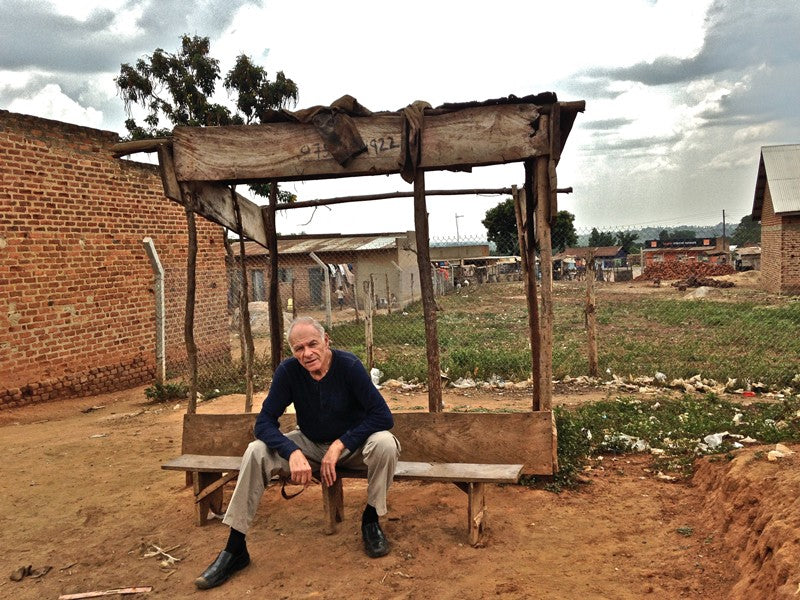
Micro-Lot Coffee
The world is lush with coffee growing regions, and inside those regions are thousands of small-scale coffee farmers, growing coffee in hundreds of different micro-climates and soil types. This is where we find the “micro-lot.”
Together with dozens of varietals (air, shade, wind, sun, rain, soil type, etc.), the coffee flavor is created in all its possibilities.
We have been in the coffee game for over forty years, and know the territory well, from Papua New Guinea to Nicaragua.
We know the farmers and they know us. Together we find these small, exceptional “micro-lots” produced by individual farms in quantities of no more than 10-20 sacks (1500-3000 pounds).
We pay the farmer a premium, and everyone involved is happy that a rare and quality coffee did not get lost in the crowd of good and quality coffee.
When the coffee finally arrives at Thanksgiving Coffee Company, our Roastmaster Jacob Long roasts the coffee 3-5 pounds at a time, using his knowledge to bring out the magic from each bean.
So when you see Thanksgiving Coffee offering a micro-lot coffee, you can be certain that you’re purchasing one hell of a great coffee.
– Paul Katzeff

Micro-Lot Coffee
read more